Painting Tutorial: Realistic Skeletons
/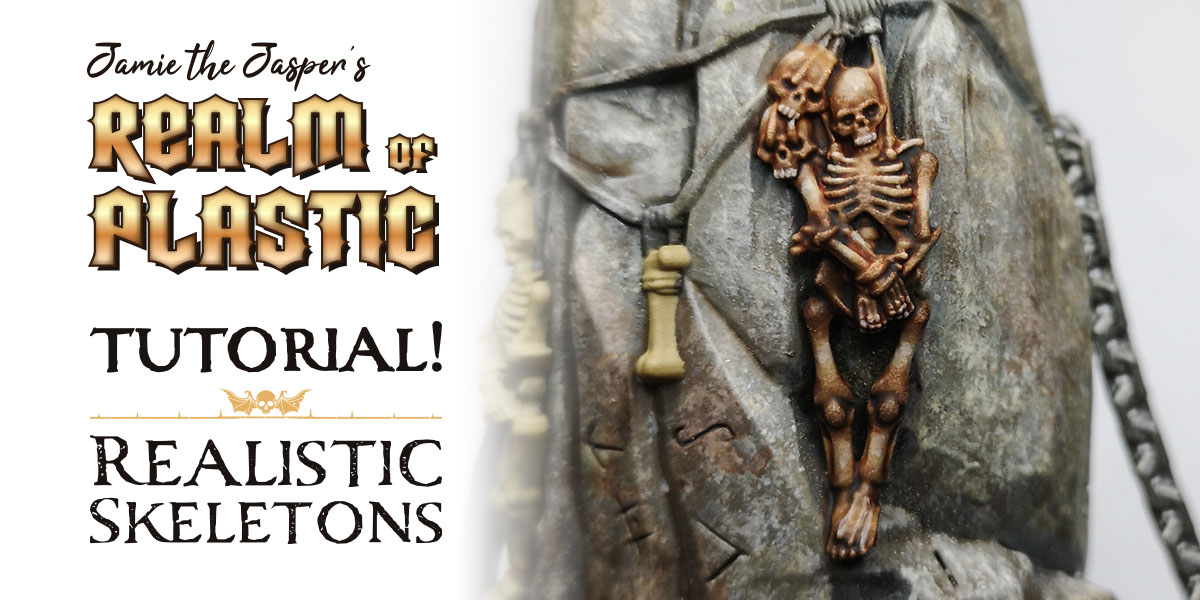
In which Jamie shows you how to bring your skeletons to life - figuratively speaking.
Work on my Beasts of Chaos herdstone for Warhammer Age of Sigmar continues apace - specifically, a pace similar to that of a spawn with no legs. Nevertheless, some progress has been made, and this week I’ve been experimenting with painting the skeletal trophies that dangle eerily from this exquisitely detailed terrain piece.
I’m aiming for a degree of realism with this model, and that goes for the skeletons too. To achieve this, I needed to think about how a body might look if it had been strung up and left in the elements until only the bones remained. That meant looking at a lot of reference images of ancient mummies, desiccated corpses and other such unpleasant things. The final look achieved using the process set out in this tutorial is the culmination of that macabre research.
Now, when I say ‘realistic’ I don’t mean photo-realistic - my painting skills aren’t impressive enough for that! I simply mean that I’m trying to replicate how something might look in nature, rather than using the bolder, more stylised colour schemes that you tend to see with Games Workshop’s studio armies. I suppose ‘naturalistic’ might be a more accurate description. The good news is that this naturalistic look is actually quite easy to achieve.
Click on any image below to see a larger version.
Step 1 - Basecoat & Drybrushing
Firstly, basecoat your skeleton with Zandri Dust - two thin coats, as Saint Duncan of Rhodes would say. This basecoat is going to be showing through quite a lot on the finished model, so you want it nice and even. Then drybrush the whole skeleton heavily with Karak Stone, followed by a lighter drybrush with Flayed One Flesh, and a final light drybrush with Pallid Wych Flesh.
Step 2 - Washes
Give the whole skeleton two thin washes with Reikland Fleshshade, allowing the first wash to fully dry before applying the second. Then apply two thin washes of Agrax Earthshade on and around the lower half of the rib cage, the ‘face’ and all the joints were the bones meet. Follow this with two thin washes of Nuln Oil applied only to the lower third of the rib cage, the eye sockets and the immediate area around the joints - focus on a slightly smaller area this time.
Step 3 - Highlights
This last step is going to be very counter-intuitive, but stay with me! On your palette, mix 2 parts Lahmian Medium to 1 part Zandri Dust, then highlight the top of the skull, the upper ribs and the central areas of the longer bones. This is a very thin mix, so you’ll need to apply the paint two or three times to build up the colour - this should give you a subtler colour transition between this layer of paint and those underneath. Don’t highlight the raised areas of the model as you normally would. Finally, mix 2 parts Lahmian Medium to 1 part Rakarth Flesh and apply to the same areas in the same way, focusing on a slightly smaller area to create a transition or gradient with the previous layer. Also apply your Rakarth Flesh mix to the teeth and knuckles.
And that’s it! I think this gives quite a striking look for minimal effort - it’s mostly drybrushing and washes!
If this tutorial has inspired you to paint a herdstone yourself, why not order one from Firestorm Games with a substantial discount on the recommended retail price. They also stock all the paints and brushes used in the tutorial. Ordering from Firestorm Games via this link helps keep the light of Azyr shining on the Realm of Plastic.
Please take a moment to hit ‘like’ below, share this article or just leave a comment to say ‘Hi!’. It would mean a lot to me. Thanks for reading!